In today’s journey, we’re diving into the exciting world of car audio, focusing on How to Install Sony Car Subwoofer. You might wonder, why add a subwoofer to your car?
Well, it’s like giving your music a power boost, making every beat and bass line feel alive! A subwoofer adds depth and richness, transforming your car into a mobile concert.
Whether you’re a music enthusiast or enjoy good sound quality, a subwoofer can make a difference. Together, we’ll explore the perks of having this fantastic audio upgrade in your car and unravel the steps to install it. So buckle up, and let’s get started on this auditory adventure!
In this article, we’ll walk through the benefits of having a subwoofer in your car and provide a simple, step-by-step guide on installing one. Whether you’re a car audio newbie or a seasoned pro, we’ve got you covered. Let’s dive in and turn up the bass!
Necessary Tools and Materials

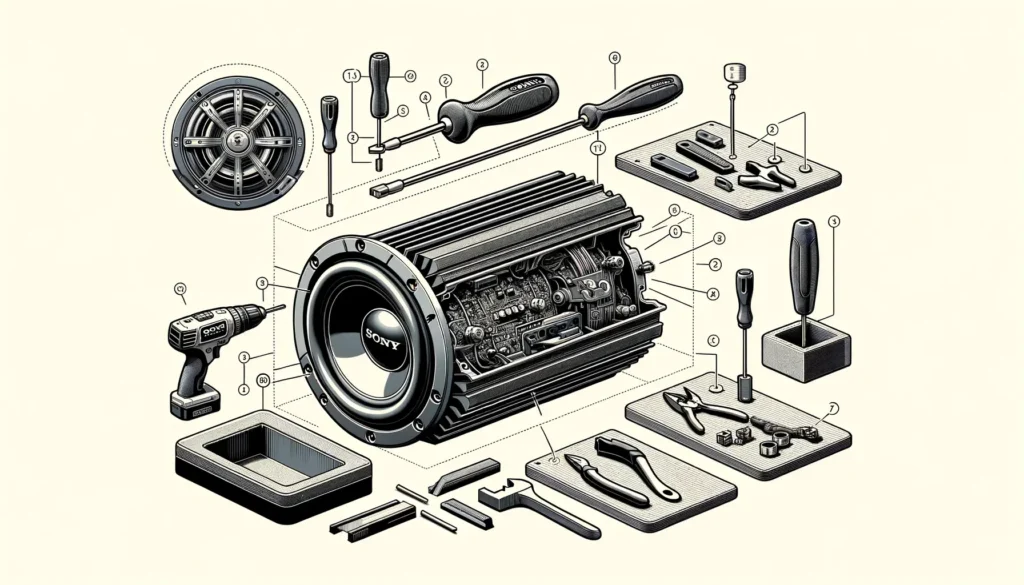
- Subwoofer: This brings out the bass in your music, making it sound richer and fuller.
- Amplifier: It gives the subwoofer the power to produce intense sounds.
- Wiring Kit: This has all the essential wires, so you don’t have to buy them separately.
- Speaker Wire: It carries the audio signal from the amplifier to the subwoofer.
- Power Wire: It provides the electrical power the amplifier needs from the battery.
- Ground Wire: This prevents electrical issues and keeps everything running smoothly.
- RCA Cables: They transmit the audio signal from the car stereo to the amplifier.
- Screwdriver: You’ll use this to secure various components and make connections.
- Wire Stripper/Crimper: This tool helps you prepare the wires for connection.
- Wire Connectors: They ensure all wire connections are secure and won’t come loose.
- Zip Ties: These help organize the wires, keeping them neat and out of the way.
- A Fuse: It acts as a safety net, cutting off power if there’s an electrical problem.
- Enclosure: The subwoofer sits in this box, which helps enhance the sound quality.
By gathering these tools and materials, you’re setting yourself up for a successful installation. Remember, each item has its unique role, and skipping one could make the process more complicated. So, let’s ensure we have everything we need and get ready to boost our car’s audio to the next level!
Preparation

Importance of Preparing Your Car and Workspace:
Before we dive into the exciting task of installing a subwoofer in our car, it’s crucial to prepare both the car and our workspace. This is like when we clean and organize our room before starting a new project; it makes everything go smoother.
Ensure your car is parked on a flat surface and the engine is off to create a safe environment. Now, let’s talk about our workspace. We need a clean, well-lit area with enough space to lay out all our tools and materials.
This not only helps us stay organized but also ensures that we can easily find and reach everything we need, making the installation process faster and more enjoyable.
Safety Precautions and Considerations:
Safety always comes first! When working on your car, it’s essential to disconnect the battery to prevent any electrical shocks or accidents. Make sure you’re wearing the right protective gear, like gloves and safety glasses, to protect yourself from any potential harm.
Remember, we’re dealing with wires and electrical components, so it’s better to be safe than sorry. Additionally, keep a fire extinguisher nearby just in case anything goes wrong.
Lastly, if you feel unsure or uncomfortable with the installation process, don’t hesitate to seek help or consult a professional. Your safety is our top priority, and we want to ensure that this experience is not only rewarding but also safe.
By taking the time to prepare and prioritize safety properly, we set ourselves up for a successful and enjoyable car subwoofer installation experience. So, let’s get everything ready, put on our safety gear, and get ready to boost the bass in our car audio system!
Removing the Old Subwoofer (if applicable)

Explaining How to Remove an Existing Subwoofer:
If you’re upgrading your car’s audio system and already have a subwoofer installed, you’ll need to remove it before installing the new one.
First, ensure your car’s battery is disconnected to guarantee a safe working environment. Next, locate the old subwoofer. It might be in the trunk or under a seat, depending on your car model.
Once you’ve found the subwoofer, carefully remove any panels or coverings that might be in the way. You might need a screwdriver for this part.
When the subwoofer is exposed, please note how it’s connected. You’ll see wires running from the subwoofer to the car’s audio system. Carefully disconnect these wires, paying attention to where each one is connected—you might want to take a picture or make a note to help you remember later.
Now that the wires are disconnected, you can remove the subwoofer. It might be secured with screws or bolts, so have your screwdriver or a wrench ready. Once all the screws or bolts are removed, gently lift the subwoofer out of its housing.
Highlighting the Key Steps to Uninstall the Old Subwoofer Safely:
- Disconnect the Car Battery: Always start by disconnecting the car battery to ensure a safe working environment.
- Locate the Old Subwoofer: Find where the subwoofer is installed in your car.
- Remove Panels or Coverings: Carefully take off any panels or coverings that are concealing the subwoofer.
- Disconnect the Wires: Detach the wires connecting the subwoofer to the car’s audio system, noting where each wire is connected.
- Unscrew and Remove: Use the appropriate tools to remove any screws or bolts holding the subwoofer in place, then gently lift it out.
- Keep everything Organized: As you remove parts and wires, keep them organized and in a safe place so nothing gets lost or damaged.
By following these steps carefully, you can safely remove the old subwoofer and make way for your new, upgraded audio experience. Remember, patience is critical, and if you ever feel unsure, it’s okay to ask for help or consult a professional. Happy uninstalling!
How to Install Sony Car Subwoofer?
Choosing the Right Location
Placement Options for Sony Car Subwoofer:
Finding the perfect spot for your new Sony car subwoofer is like picking the best seat in a movie theater – it makes a huge difference! Familiar places include the trunk, under the car seats, or even the cargo area if you have an SUV.
Each spot has its perks. For instance, placing the subwoofer in the trunk might give you the most powerful bass, but it could also take up a lot of space. On the other hand, tucking it under a seat could save space but might mean a bit less boom.

Factors to Consider:
Think about the size of your subwoofer and your car. More giant subwoofers generally need more space. Also, ponder on the wiring. Ask yourself, “Is it easy to run wires to this spot?” And, of course, think about sound quality.
You want a location that makes your music sound just suitable. A little tip: test out different spots by playing music and listening to how it sounds before making the final decision.
Wiring and Connections

Wiring Process:
Once you’ve picked the perfect spot, it’s time to get our hands dirty with some wiring. First, ensure the car’s battery is disconnected. Safety first, always! Run the power wire from the battery to the location of the subwoofer, making sure it’s away from any moving parts and secured tightly.
Connect the ground wire from the subwoofer to a metal point in the car. This is super important for a safe and smooth performance.
Step-by-Step Connection Guide:
- Connect the power wire to the battery.
- Run the power wire through the firewall to the inside of the car.
- Connect the RCA cables from the car stereo to the amplifier.
- Connect the remote turn-on wire from the amplifier to the car stereo.
- Attach the ground wire to a metal point near the subwoofer.
- Connect the speaker wires from the amplifier to the subwoofer.
- Secure all wires, ensuring they’re not dangling or in the way.
Mounting the Subwoofer
Securing the Subwoofer:
Now, let’s secure our subwoofer so it’s snug and safe. If you’ve chosen a spot in the trunk, you might use screws to attach it directly to the car. If it’s under a seat, use brackets. Make sure it’s tight and secure. We don’t want it rolling around while we drive.
Tips for a Firm Attachment:
When you think you’ve got it secure, give it a gentle shake to test. If it moves, tighten it a bit more. Also, adding some padding around the subwoofer can help prevent any rattles and ensure it stays put.
Now, reconnect the car battery, turn on your car, and give it a test. Play some music with a good bass line and listen. If everything sounds good and there’s no rattling, you’ve done it! Your Sony car subwoofer is ready to roll!
By following these steps carefully, you’ll not only ensure a safe and secure installation but also the best possible sound quality from your new Sony car subwoofer. Enjoy the deep bass and enhanced audio experience on your drives!
Testing and Fine-Tuning

Testing the Subwoofer and Adjusting Settings:
Now that your Sony car subwoofer is all setup, it’s time for the fun part – testing and fine-tuning the settings to get that perfect sound! Start by turning on your car and audio system.
Choose a song that you know well and has a good range of bass. Keep the volume moderate; we don’t want to blow out our new subwoofer on the first go!
First, listen to the bass. Does it sound clear and powerful, or is it more of a rattle? If it’s not right, no worries – that’s what the fine-tuning is for.
Head to your audio system’s settings and find the subwoofer or bass settings. Here, you can adjust the volume, crossover, and phase settings of your subwoofer.
- Volume: This controls how loud the bass sounds. Adjust it until the bass sounds balanced with the rest of the music, not overwhelming it.
- Crossover: This sets the point at which low-frequency sounds are sent to the subwoofer. You should play around with this setting to find the sweet spot where the bass sounds smooth and consistent.
- Phase: This controls the timing of the bass sounds. If your bass sounds a bit off-beat or muddy, adjusting the phase can help clear it up.
Balancing the Sound for Optimal Performance:
Balancing the sound is like adding the right amount of seasoning to a meal – it makes everything come together perfectly. You want the bass to complement the music, not dominate it. So, take your time to find the right balance between the bass and the other speakers in your car.
Remember, what sounds good in one song might not work for another, so be prepared to adjust as needed. And keep in mind that everyone’s ears are different, so what sounds perfect to you might not be the same for someone else. Trust your ears and adjust until it sounds just right to you.
By taking the time to test and fine-tune your Sony car subwoofer properly, you’re ensuring the best possible audio experience. So, crank up the tunes and enjoy the rich, powerful bass your new subwoofer brings to the party!
Troubleshooting Common Issues

Identifying Common Problems:
Even with the best preparation and careful installation, you might run into a few hiccups along the way. Let’s go over some common issues that could pop up and how to fix them.
No Sound from the Subwoofer:
This is like when you try to start your car, and nothing happens. Check all your connections to make sure everything is plugged in right. Also, ensure the subwoofer is turned on in your audio system’s settings.
Distorted or Rattling Sound:
If your bass sounds more like a bumblebee than a deep rumble, there could be a few culprits. First, check to see if the subwoofer is securely mounted. If it’s loose, it might rattle. Next, adjust the subwoofer settings discussed in the Testing and Fine-Tuning section.
Subwoofer Overheating:
Just like how we need to cool down after a run, your subwoofer needs to stay calm, too. If it’s getting too hot, make sure it has enough ventilation. Sometimes, placing it in a different location can help.
Solutions and Tips for Resolving Issues:
No Sound from the Subwoofer:
- Double-check all your connections. Make sure everything is plugged in securely and in the right place.
- Ensure the subwoofer is turned on and set to the correct input in your audio system’s settings.
Distorted or Rattling Sound:
- Make sure the subwoofer is securely mounted. If it’s loose, tighten it up.
- Play around with the subwoofer settings. Adjust the volume, crossover, and phase until the bass sounds clear and powerful.
- Check for any objects that might be rattling around near the subwoofer.
Subwoofer Overheating:
- Ensure there’s enough ventilation around the subwoofer. It needs space to breathe.
- Try moving the subwoofer to a different location if it continues to overheat.
Remember, it’s okay if everything doesn’t go perfectly the first time. Troubleshooting is just another step in the installation process. With a bit of patience and some careful adjustments, you can get your Sony car subwoofer sounding just right. And once you do, the enhanced audio experience will be worth the effort. Happy listening!
FAQs
What is needed to install a subwoofer in a car?
To install a subwoofer in a car, you’ll need a subwoofer, an amplifier, a wiring kit (including power, ground, and speaker wires, as well as RCA cables), a screwdriver, wire cutters and strippers, crimping tools, and possibly a drill. You may also need a line output converter if your car stereo doesn’t have subwoofer outputs.
Where to install a subwoofer in a car?
Common locations for a car subwoofer include the trunk, under a seat, or in the cargo area of an SUV. The right spot depends on your car’s design, the size of the subwoofer, and your personal preference for sound quality and space utilization.
How do I connect my Sony subwoofer?
To connect a Sony car subwoofer, run the power wire from the car’s battery to the subwoofer, connect the ground wire to a metal point, and connect the RCA cables from the car stereo to the subwoofer. Make sure all wires are securely connected and adequately routed to avoid damage.
How do I connect my Sony subwoofer to my Sony soundbar?
To connect a Sony subwoofer to a Sony soundbar, locate the pairing button on both the subwoofer and soundbar. Press the pairing button on the soundbar, then press the pairing button on the subwoofer within a few seconds. The devices should connect wirelessly, indicated by a solid light on both units. Ensure both devices are powered on and close to each other during this process.
Conclusion
In this guide, we’ve walked through the entire process of how to install Sony car subwoofer, from gathering the necessary tools and preparing the workspace to choosing the right location and ensuring all wires are correctly connected.
We also covered how to secure the subwoofer, fine-tune the settings for optimal sound quality, and troubleshoot any common issues that might arise.
A well-installed Sony car subwoofer can transform your driving experience, providing a deep, powerful bass and enhanced audio quality. It’s not just about the music; it’s about creating a rich and immersive sound experience every time you hit the road.
So go ahead, hit play on your favorite playlist, and enjoy the fruits of your labor. You’ve earned it! And remember, a little time and effort spent on proper installation and fine-tuning can make all the difference in the world regarding your car audio experience. Happy listening!